The Rougher Side of Beautiful
Good landscape design isn't just about the pretty stuff.
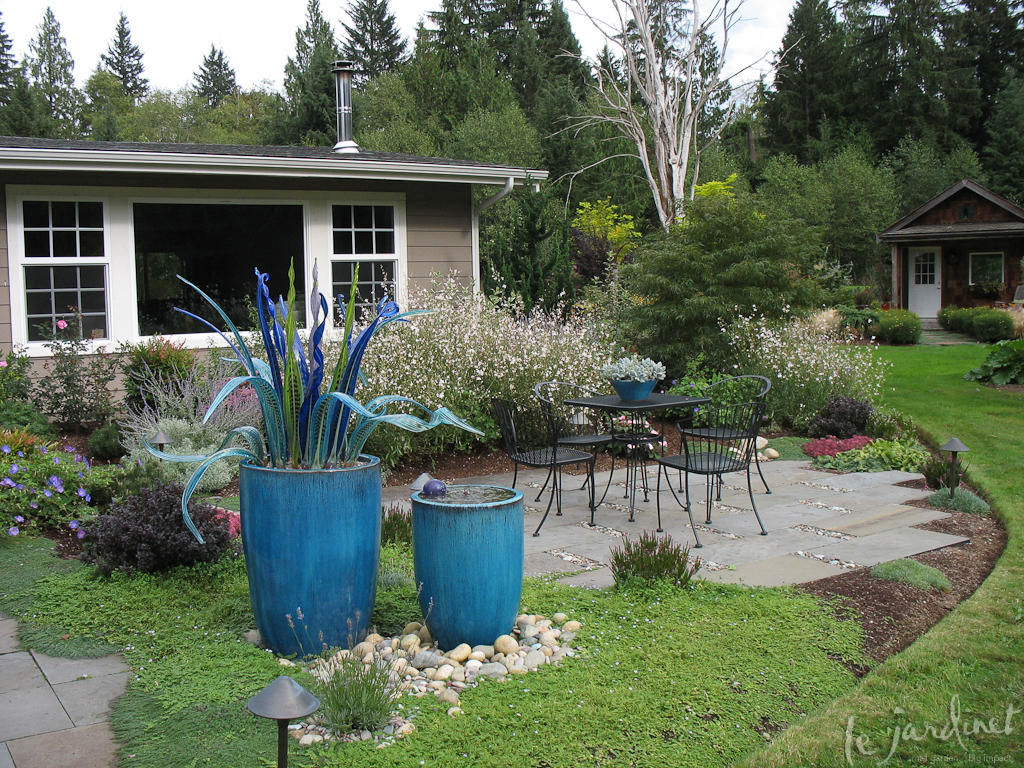
As you browse Pinterest boards, Houzz ideabooks, garden design books, websites and magazines I'm sure you are drawn to the dreamy images of a rambling rose adorning a weathered arbor, the quaint sitting nook, complete with vintage tea table set for two, or the perfectly proportioned patio and pergola that inspires you to do something similar in your own garden – not the overhead power lines, weedy driveway or soggy lawn. Yet most landscape designers have to address these issues before we can get you to 'beautiful' and our own gardens are no exception.
I can selectively frame my photographs to avoid things I'd rather you didn't see – and have been doing just that for some time! Today I'll show you a less-than-glamorous two month long project that is almost complete. I'm not going to wait for the borders to be mulched, for the flowers to be in full bloom or the dandelions to go away. This is the reality. Garden design, just like gardening itself, sometimes is just plain down and dirty. Dollars often have to be spent on things other than pretty plants but the reward is – eventually – worth it.
The Problems
Overhead Utility Lines
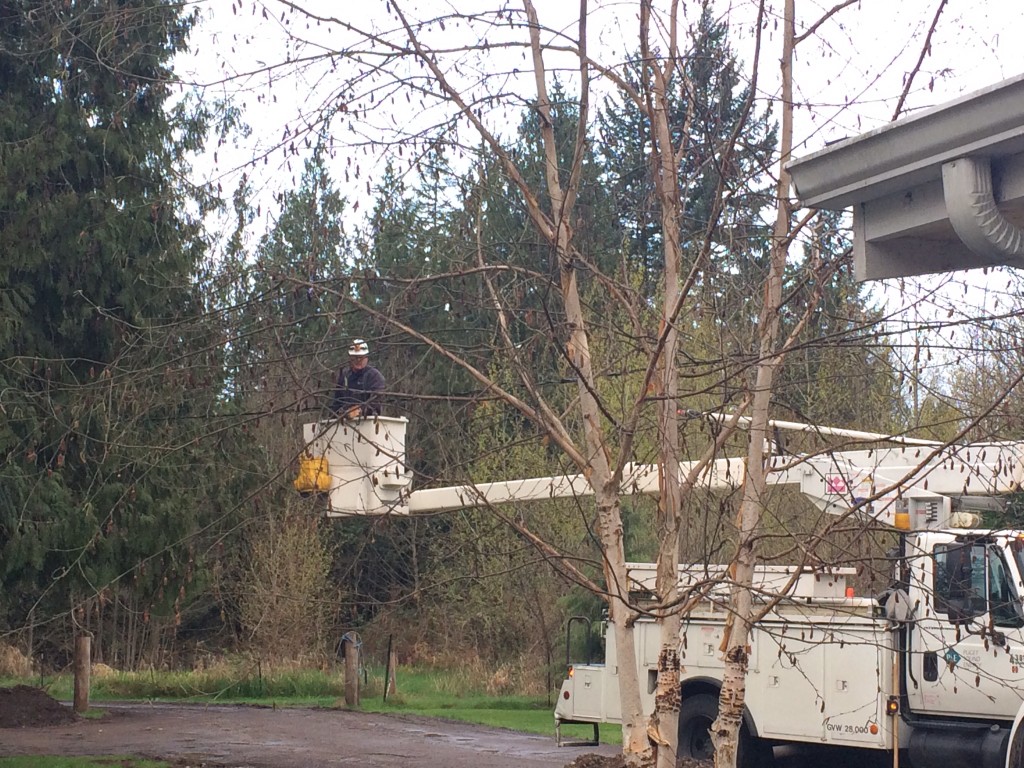
SO exciting to see these power lines come down!!
While not uncommon in rural areas these can pose quite the challenge for delivery trucks, especially when the lines barely make the minimum 12' height clearance required. In our case we had overhead electricity lines, around which was wrapped our phone line, all neatly tied together by wire (yes you read that correctly) and orange flags. In theory this was to alert drivers – whether to electrocution or decapitation we were never too sure but as decorative prayer flags they were far from attractive, and really detracted from what should have been curb appeal.
Of course we live at the end of a dead-end gravel road so 'curb appeal' isn't really relevant but that does bring me to the next problem…..
Ugly, Weedy Driveway
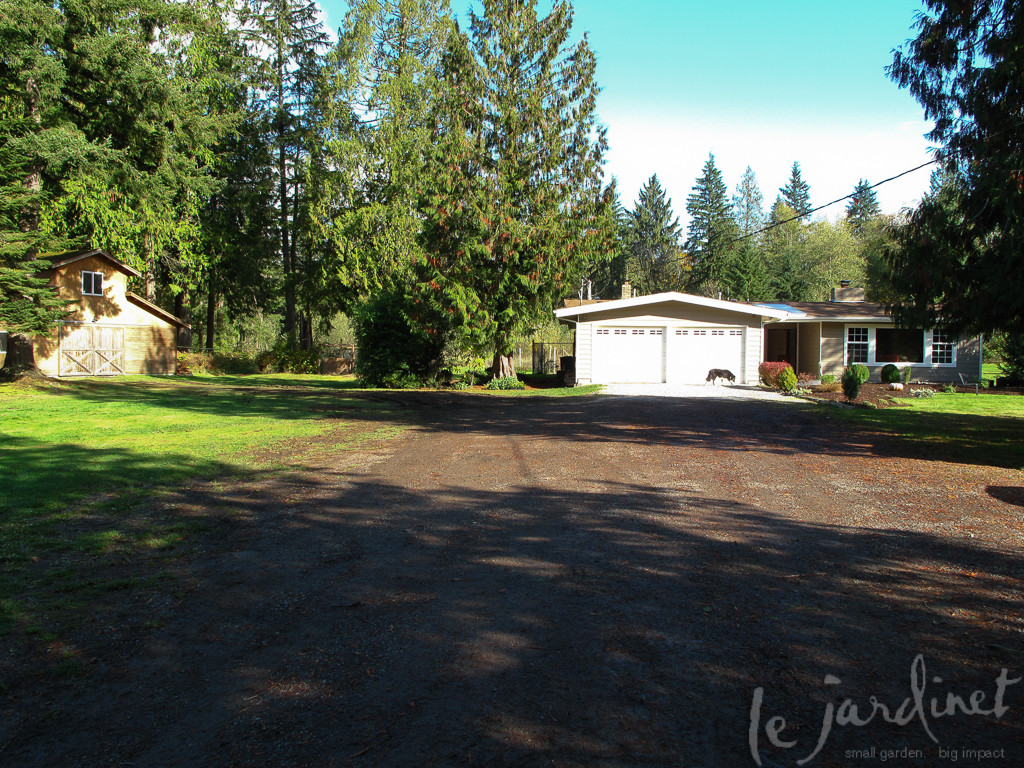
This is how things looked on the day we moved in; October 2009
Over the years the driveway has been altered from a straight 140' run to the garage, to include a pull-out to facilitate turning vehicles and eventually to a broader sweeping curve that leads away from the house to serve the barn and greenhouse. In fact today we no longer have a garage so it was important to redirect approaching vehicles to a side parking area.
Meanwhile the weeds had become a regular battle and the definition between the grass, planted borders and gravel driveway had morphed into a mess.
The overall appearance was one of abandonment – the home and garden looked well cared for but the driveway gave the impression of country living at its worst and we weren't proud of it.
The Front Path was Too Narrow

Originally the concrete path ran from the garage to a recessed entry – photo taken on move-in day
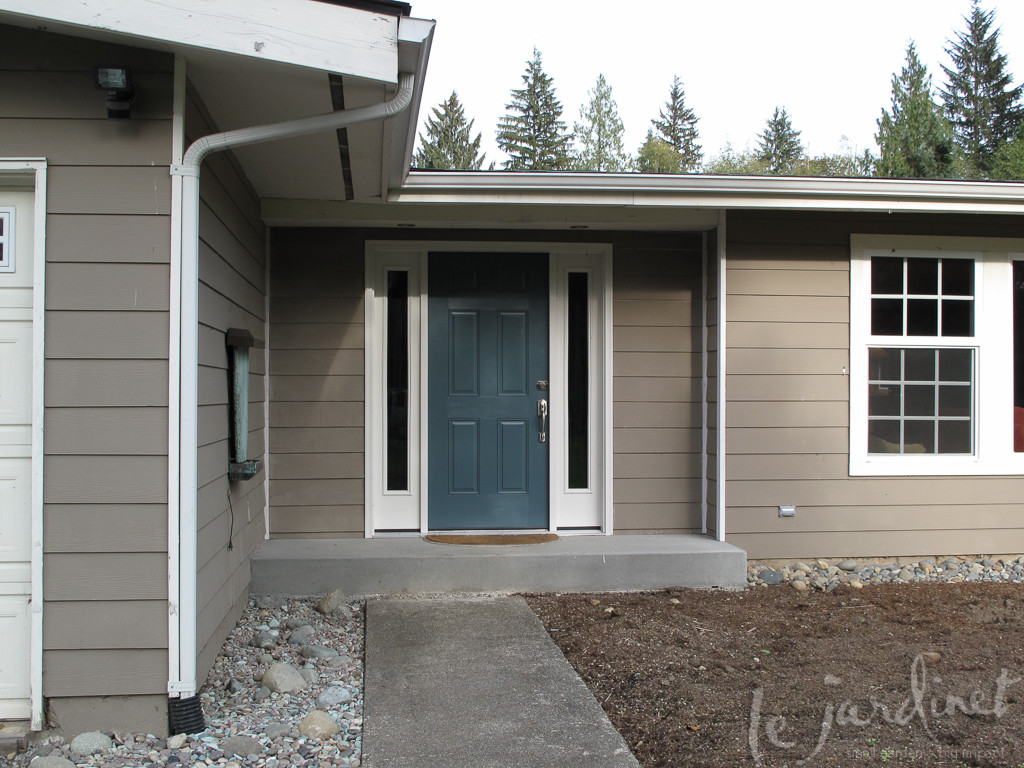
When the front entry was revised and the new door centered the old path didn't connect easily. October 2010
When I first sketched our front landscape design in 2009 I knew I wanted to work with crisp rectilinear shapes rather than a traditional sweeping curve. It was one way I could take this 1960s rambler and give it a more contemporary, youthful look as well as being a play off the windows.

With the garage now converted to living space it was time to re-think the front path and pull it away from the house. April 2011
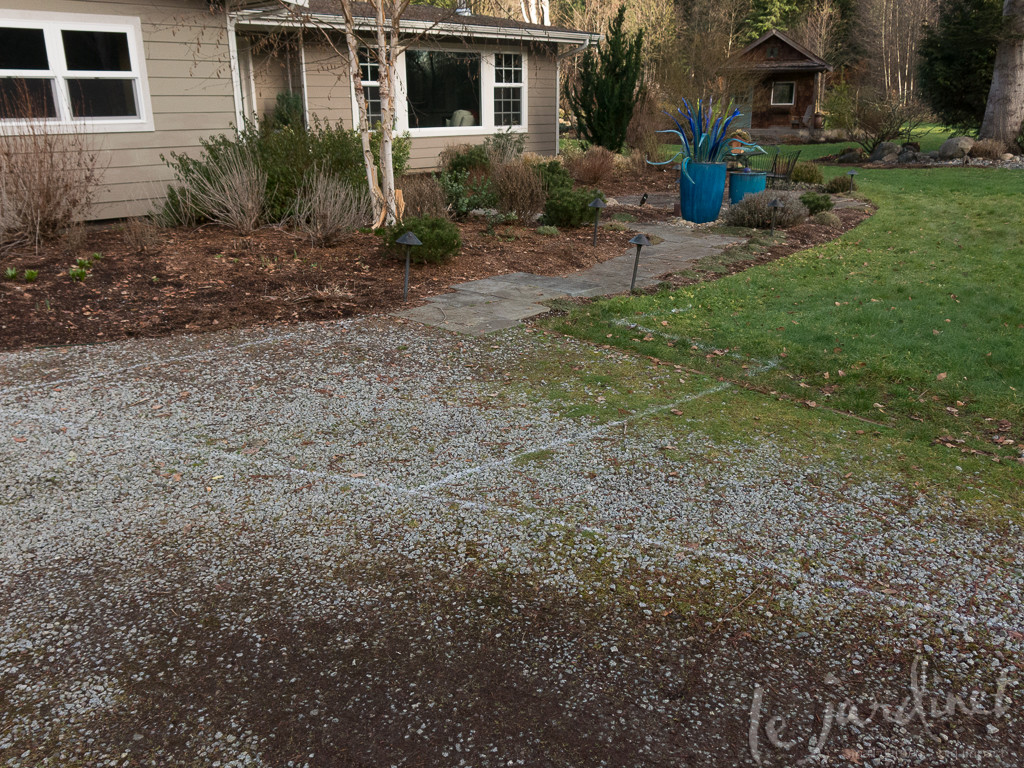
I added Elfin thyme to soften the edges and thought it was a success – briefly. I quickly realized that by offsetting the pavers that way I had made the path too narrow, exacerbated by the creeping thyme.
Those pavers are heavy and we just couldn't face re-setting them – but the time had come to do something about it.
The Plan
Removing the Prayer Flags
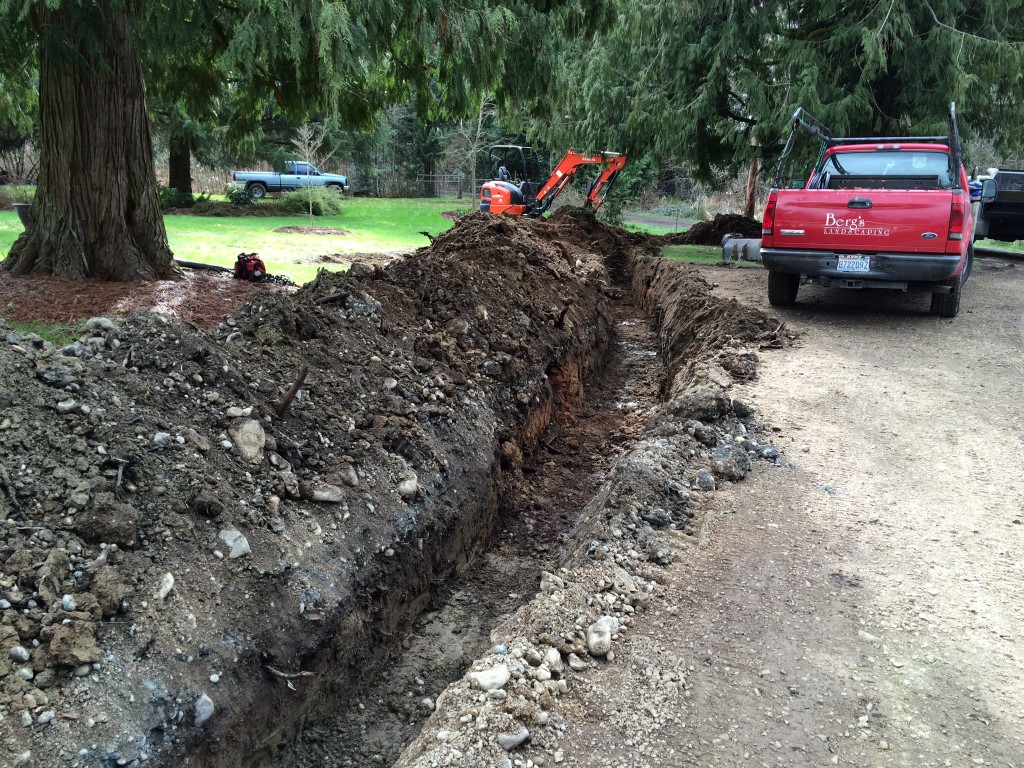
The utility cables would be buried underground by digging a 2' wide, 3' deep trench from the house, under the driveway to the utility pole; 147' in all. A local electrician would take care of permits, lay conduit, run wires and revise our meter while the utility companies would take care of disconnecting and reconnecting as needed.
It had to get worse before it got better
Meanwhile my friends and colleagues at Berg's Landscaping would tackle the excavation.

It rained constantly! We had to run a sump pump in this pit so the utility crews could work
Sounds straightforward? Try coordinating that many peoples schedules and you'll quickly realize otherwise! It took almost two months. Local stores reported record sales of wine and chocolate….
Spiffy New Driveway
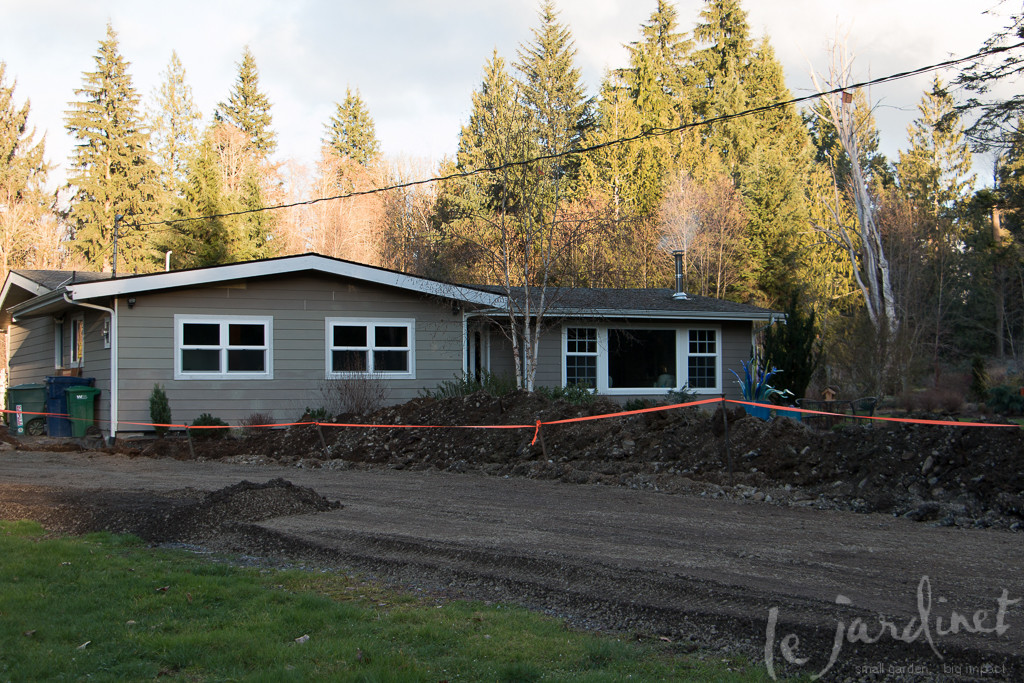
Could it get any worse? Yes it did…. With the trenching it looked as though we had a major mole infestation! For a while we couldn't access the front door and now we had orange tape to coordinate with the orange prayer flags
Meanwhile we decided to add concrete curbing to the driveway as a way to make things more orderly and fill in with fresh, compacted gravel over landscape fabric. Other ideas we considered were concrete and asphalt but both would make this look like a runway due to the sheer size and didn't really work with the overall aesthetic. Pavers would have been beautiful but cost prohibitive.
We also wanted to keep this as a pervious surface taking into account the high water table in this area and our clay soils. Any rain we can get to soak into the land rather than pool or run off is a good thing
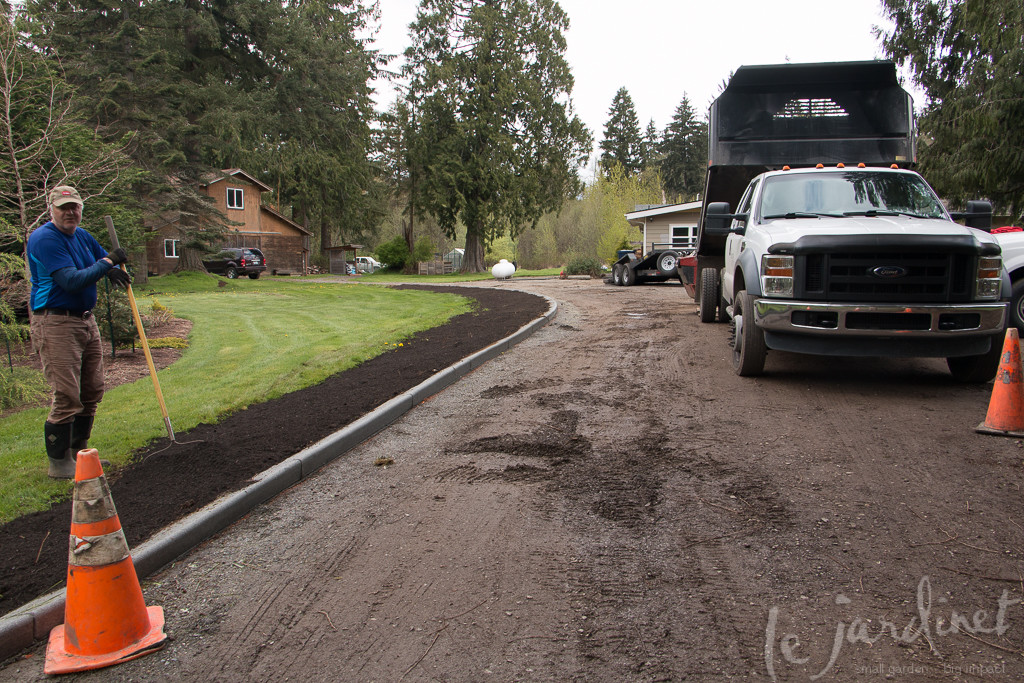
The crew from Berg's Landscaping preparing for gravel and easing the grade on the outer edges of the curbing with new soil and grass seed to facilitate mowing
The main challenge was where to stop? Should we run the curbing all the way to the barn for example? To the greenhouse? That certainly would have made everything looks clean and sparkly but it would also have directed the eye – and possibly vehicles, away from the home. One of the aims was to establish public versus private boundaries.
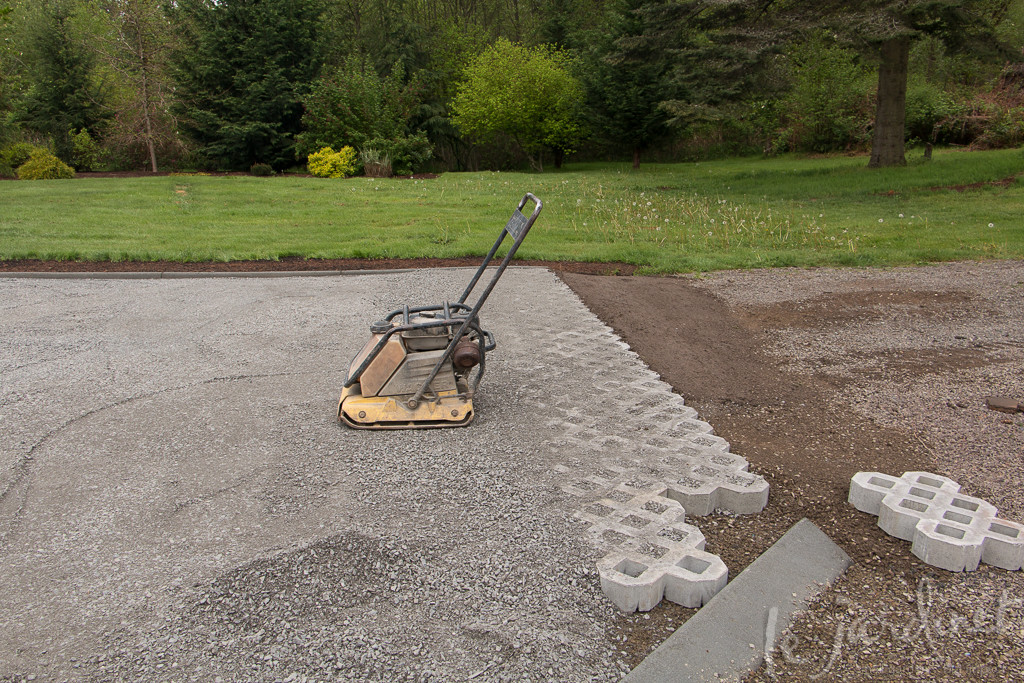
Grascrete acts as a visual endpoint while the angled curbing indicates parking
Berg's had the great idea to create a transition using Grascrete blocks, in this case filled with gravel rather than grass. The blocks suggest an endpoint for visitors yet are easily driven over when we need to.
Refine the Front Path
We marked the new path entry with paint to get a feel for it
Once again landscape architect John Silvernale helped me out with ideas. He liked my concept of the offset pattern, the journey through the front garden and agreed with me that just one additional 18" paver width would solve the problem. However he also suggested making a more substantial 'landing' at the front door as well as the point where it meets the driveway.
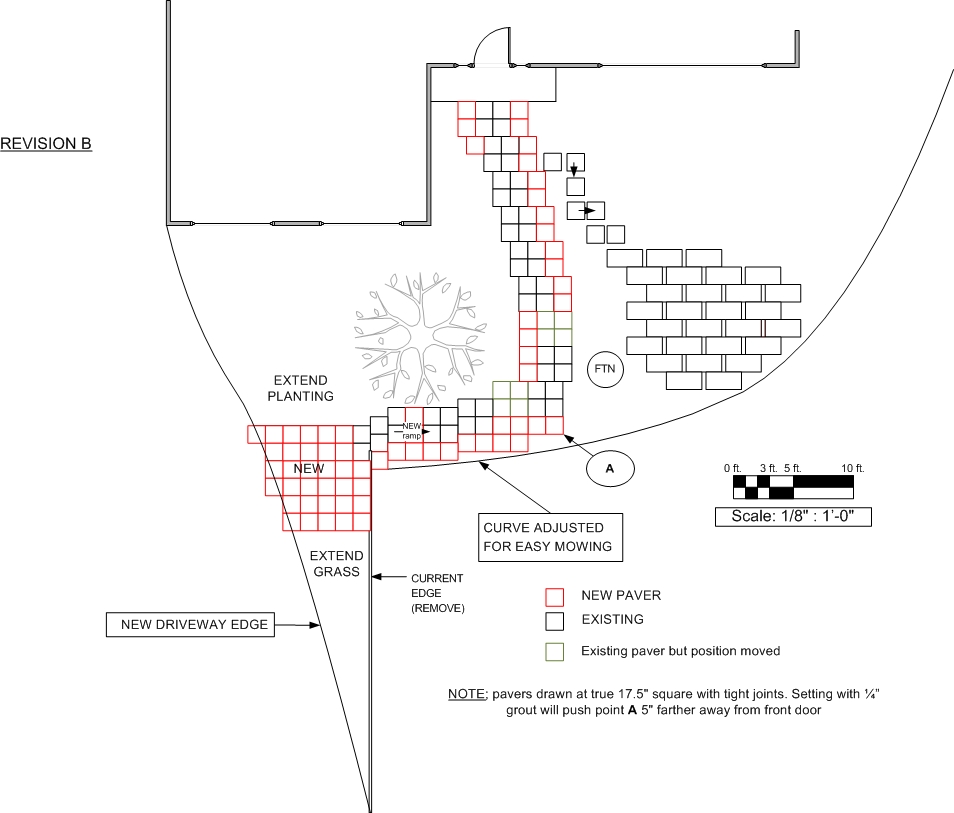
I find it helpful to sketch things out on paper (or the computer) as well as visualizing in situ. It helps to assess materials that need to be ordered, final placement in relationship to other elements such as the driveway and tree and also spot any problems. The plan above shows sections of the original path in black, some placement adjustments that I felt were needed (in green) and the expanded landings and path width using new pavers (in red).
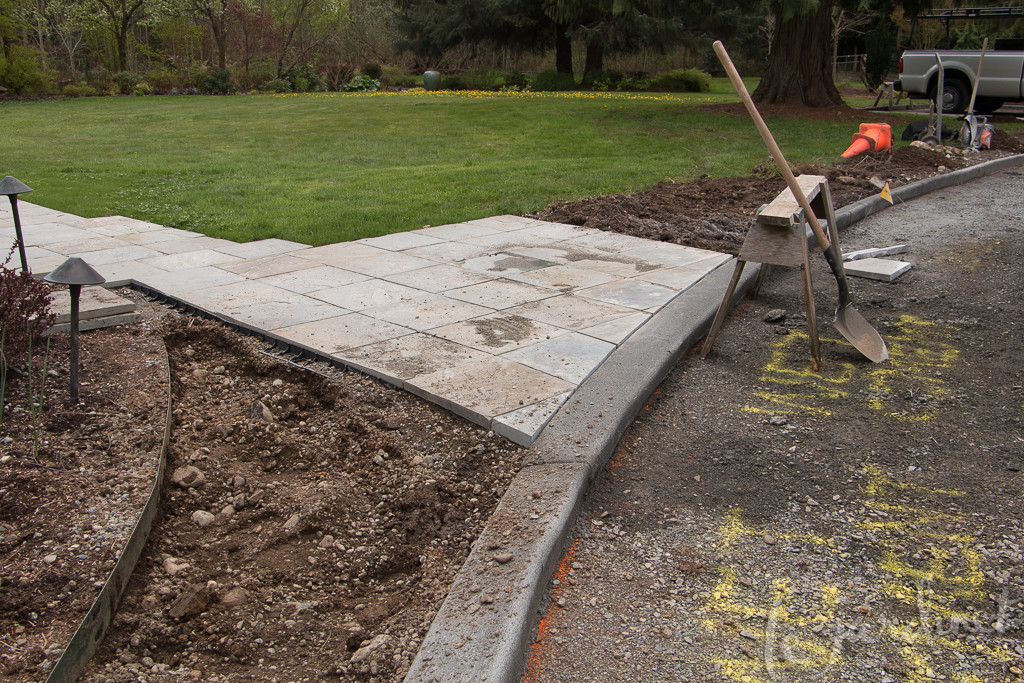
It starts to come together!
The talented crew from Berg's lifted the original pavers (I cleaned them first with 30 second cleaner and a stiff scrubbing brush so they would blend more easily with the new bluestone), re-graded and prepared the base then set out the revised path.
The Results
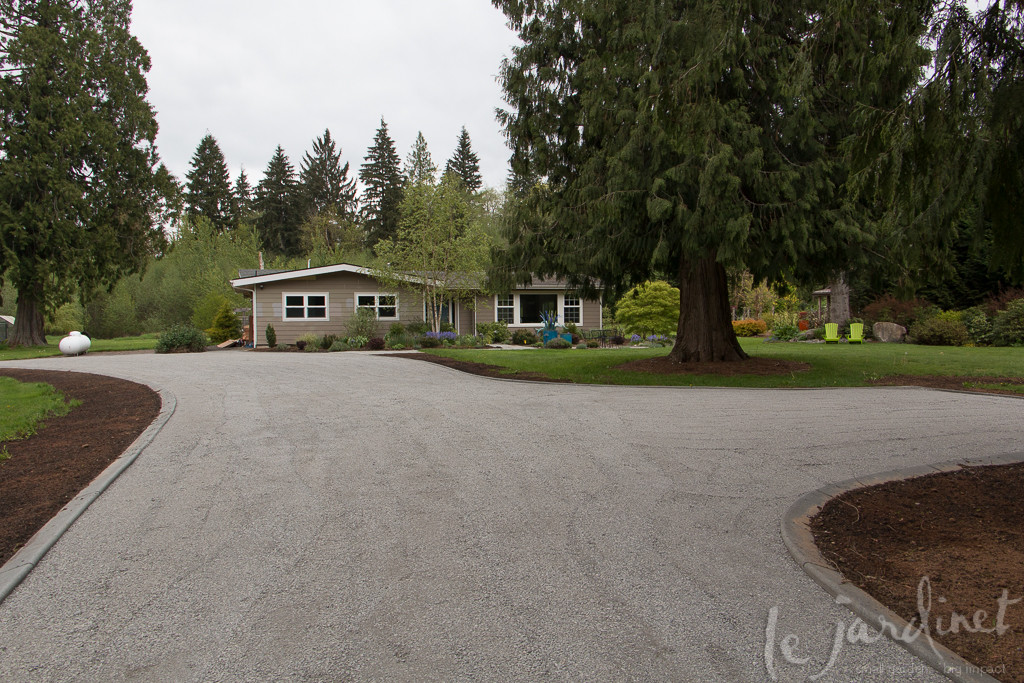
(The propane tank will eventually be moved – it used to be hidden by a stand of bamboo – not a great choice since the septic heads are also in that area!) Notice how our ex-garage doesn't look like a garage anymore since the driveway sweeps off to the left
For someone who usually only gets excited about artistic details and cool plant combinations I have to say I am thrilled with my concrete, gravel and bluestone garden additions! I love the defined boundaries and the clear routes for wheels and feet (and paws). Delivery trucks are delighted too – they automatically look for the overhead cables and are much happier now that they can reverse safely and easily.
The new large path landing gives a clear visual cue to direct visitors to the front door
We still have to finish revising the landscape lighting, mulch borders and finish planting the newly extended front bed. The grass seed needs to grow (if the robins ever stop eating it) and the house is about to be repainted which is why it has several test colors on it! So we are still not quite at beautiful, but life is like that. Sometimes it's OK to celebrate improvements even when we're not ready for the magazine photo shoot.

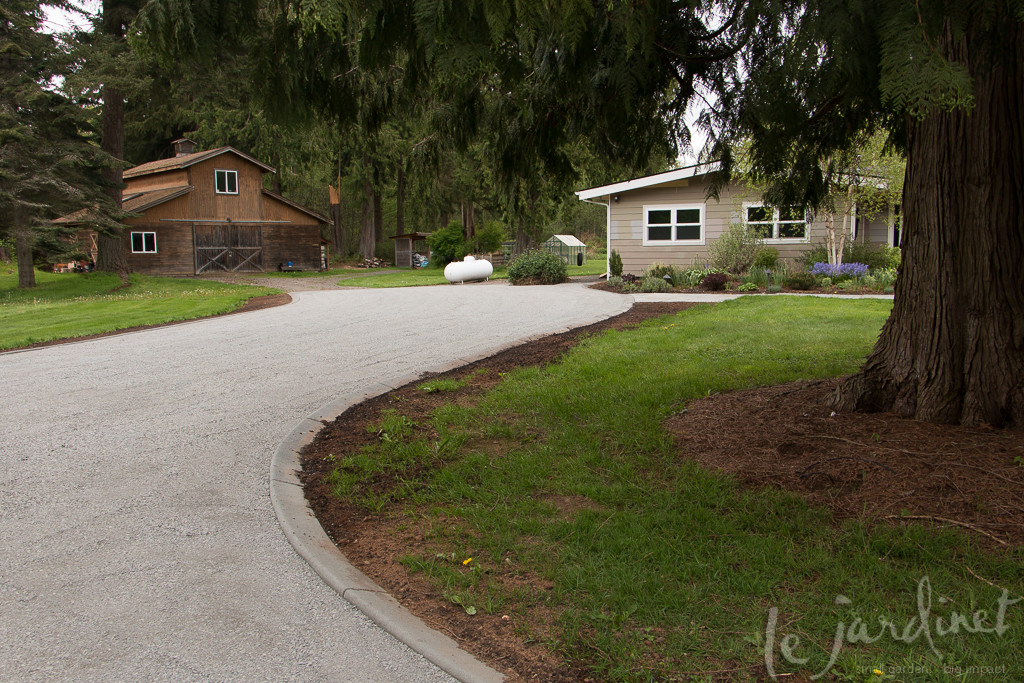
Love the broad entry from the driveway to the front path. The grass will fill in the area to the right in time
So here's to Progress. It was a long, muddy, messy and frustrating journey yet also exciting and rewarding and we are so glad we tackled this less than glamorous project. We've come a long way from a dirt track.
Do you need to get down and dirty?
Resources
A story involving befores-and-afters is always a hit!
This was one of your very best posts–with pictures, clear explanations, and plenty of inspiration. Thank you!
Karen
Thank you Karen! I'm so glad you enjoyed it. Designers always hesitate to post about their own gardens, especially when we can still see all that is left to be done. This is the non-glossy-magazine version of a renovation!
Always enjoy reading your garden blog, there's always tons of ideas and inspirations shared. Now, I'm motivated to rearrange my pavers. Your focal point of Blue pot with glass sculptures is such a beauty. The color of your sidings and blue door is perfection. All the details fits where it belong. Great Job on your project!
Thank you so much Rick – you make me feel much better about sharing the process, even when there are still a few dusty corners!
Nicely done! Burying utility lines was one of the first things I did after purchasing my present home. Likewise when a gardener bought the property across the street, he had theirs buried also. Are these ugly utility lines something only delivery persons and gardeners can see?
Makes you wonder?! Not an inexpensive fix but so glad we did it